Search This Blog

12.10.2013

Tiip Defense

My muay thai private lesson this week focused mostly on the tiip. We worked it in shadow boxing, covering the tiip’s utility as a countering tool and as weapon to use when your opponent doesn’t move.  The rear tiip is probably more usable as an offensive tool than the lead.  When throwing the lead, the rear foot becomes more perpendicular to the body, either by stepping up or by pivoting.  Now drive the lead leg knee up and seamlessly integrate the extension with the hip thrust.  The knee optimal knee height is important to attain before forward acceleration is initiated.  This is a “push” kick not a foot slap.  We spent the majority of our time working on tiip defense:
  • Lead pass, rear kick: Spring laterally in the direction of your rear foot as you clear the tiip with an inferior and lateral sweep of your lead hand.  Your rear foot should land on the ball, ready to explode into the kick, as the lead hand returns to the guard position.  Spring forward, your rear kick landing as your lead foot contact the mat.  Remember to step laterally enough to generate power.  Drive the knee toward the target, extending the body to allow the kick to whip into the target.  Recover to a ready position.
  • Lead pass, lead kick: Similar to before, spring laterally and clear the kick.  Now switch step, raise the new rear arm to head height, and deliver the kick, again leading with knee to the target.  Remember to extend the base leg and torso.
  • Rear pass, rear kick: Do the perpendicular pivot step while simultaneously using your rear hand (which turns into your lead hand as you pivot) to sweep inferiorly and medially.  Make sure you do a full perpendicular turn, placing your weight deliberately so that you may spring off the ball of the (new) rear foot.  Throw the rear kick.
  • Rear pass, cross: Step 45° diagonal and switch leads, your (new) rear leg drags a little, just to get offline of your opponent’s tiip. Simultaneously sweep your new lead hand inferiorly and medially.  Now throw a quick cross, returning to the guard position at the same time as your legs.
  • Rear pass, rear knee: As above but this time throw the rear knee, remember to pop the hips and extend the body.

Ian and I talked about how important good technique is.  Often in our excitement we want to go hard and fast.  Maybe to impress others, maybe to try to get a good workout, maybe because this what we think combat sports are about.  But untrained hard and fast leads to injury and pain which in turn often causes technical errors and longterm incorrect technique.  Speed comes slowly, technique lasts when it has gone away.

11.23.2013

Megaton Seminar: You don't have to be smart

Megaton had a light warm-up to start his seminar, nothing like the grueling hour we used to endure back in the old days.  We did jumping jacks, push-ups, and sit-ups.  We then did break fall practice, slapping the mat from the supine position, sitting, squatting, and standing.  We then did forward rolls, note that you roll over your lead leg, place the palm of the opposite hand on the floor, and then roll over the back of your other hand, forearm, arm, and shoulder.  We finished with backward rolls.  Whether you have a strong judo arsenal in your combat sports arsenal or not, a clear understanding of break falls and rolls is critical for your development.

Throws

  • Seonagi: Your opponent has a single same side lapel grip.  Reach superiorly to their grip, and secure the ipsilateral lapel.  Pull medially across your body to make your opponent step laterally, as they do meet them by turning into them. Simultaneously place your cubital fossa into their axilla, fist up palm toward in-line with their shoulder, your feet squaring with them and pointed in the same direction.  Bend forward to lift and throw them.  
  • Osoto gari: Control one arm at the elbow with the other at the lapel, lift their arm and fit tightly but stepping laterally with enough room to clear your hip.  You should close with half your chest in contact with half theirs, pushing them backward at a 45° angle, anchoring them to this leg.  Reap with a bent leg, by acting like a "dippy bird", chest coming down as leg comes up.
  • Hopping variation of osoto gari: If the leg you wish to reap is positioned posteriorly, reach your leg reap leg forward, hooking your heel behind their knee.  Now hop forward as this leg pulls toward you, your will reap them as your body moves forward and the leg pulls posteriorly.
  • Twist sweep: With lapel and opposite elbow control, close with your opponent, lateral chest to lateral chest on the elbow control side.  As you do push their elbow backward as you pull their lapel, your objective is to twist them.  This twist should provoke them to step on the lapel control side.  Block their step with the dorsal surface of your foot.  The twist and sweep all occur simultaneously, you are not kicking their leg, they are kicking your foot because they are provoked to step.

Suicide chokes

  • Cross collar and triceps control:  From a neutral kneeling postion, obtain cross collar control and pull forward, looping your arm over their head with the lapel across their neck.  Now dive your head underneath them on the side you are gripping, attempt to get your head to the opposite side as you turn over.  Cup their triceps on the side opposite your lapel grip.  If they roll to escape simply follow them by rolling with them, when you reach a prone position, hip switch to obtain a perpendicular position to your opponent, release the triceps, put your palm on the floor and slide your hand away from you, increasing the wedge height behind their head.  Start with a loose grip on the kimono lapel, too tight and you will run out of room putting undue pressure on your wrist.  Also when you hip switch, move away a little to tighten the choke.
  • Suicide mata leao: From the same neutral kneeling position, your pull forward with the cross collar grip, but they post their hand on this side on the mat.  Continue to loop their head, but this time underhook their posted arm and place the hand on the back of their skull.  Dive your head lateral to their posted arm to cinch the choke.

4-Points reversals

You are in the four points position, with our opponent hugging your from the top, parallel with you.
  • Hip out:  Grip their opposite pant leg at the knee, step out the leg on this side laterally.  Throw your free elbow up and back, simultaneously drive your head laterally and up, sliding along your opponent's body.  As soon as you are clear, turn the corner to obtain rear hip control.
  • Roll to arm lock: Grip their opposite sleeve, to block their post.  On the side opposite their controlled sleeve, step your leg out laterally to facilitate a barrel roll in the direction they cannot post.  Once they are on their back, wrap your free arm around the limb you have a grip on, proximal to their elbow, securing the figure-4 and locking the elbow.
  • Pulling guard:  Step the leg up on the outside of your opponent's body, simultaneously popping your head out on the opposite side, sit back, pulling them to the guard.

Wrapping Up

Brabo choke from guard: From the closed guard, free the kimono and feed it over their back to the opposite side, cross grip the distal piece of the passed kimono, and bring your forearm close to your opponent's body.  Now pull your opponent's arm (the one ipsilateral to the manipulated kimono) across your body.  Re-guard into a high closed guard, keeping their dragged arm's elbow against your torso, to tighten the choke.
Transition to arm bar:  If your opponent ducks under the passed kimono to avoid the choke, use the kimono to wrap their arm, then pull their arm across your body.  Drop your forearm across theirs to keep the wrapped arm trapped.  Now use your free hand to reach across to grab the shoulder fold of their kimono to spin to the arm bar.

Spider guard to X-guard sweep

From the spider guard, switch to a De La Riva hook, cup the ankle on this side, use your other leg to push their rear leg back.  Undo the De La Riva hook and set-up the X-guard, by bring this foot into their far hip, with your knee now behind their cupped leg.  Your other foot now goes behind their far knee.  Pass the arm sleeve of their rear leg to the hand that was cupping their heel, making an overhook of their leg.  Extend your legs as your tilt them laterally over their trapped arm.  Come to the knee on stomach position.

Berimbolo

From seated De La Riva, cup their ankle on the hook side, and obtain the cross collar grip with your other hand.  Extend your legs and push laterally to have them fall to their posterior.  Now perform a straight roll, perpendicular to their hooked leg.  As you end up on your back, you should still be hooking the leg, your opposite leg is across their body at the hips, switch your ankle grip to their opposite ankle.  Now roll them by pulling with your leg hook and guiding their ankle.  You should end up behind them but will need to pull them/climb to get their back.  If not you can simply sprawl on their legs and pass.  If that was clear as mud, this may help:

Leg Drag Pass

From a open guard position, grip one pant leg with both hands, pressure in and then retract simultaneously pulling their leg across your body.  You want to get the posterior side of their thighs against your legs.  Keep the grip ipsilateral to their leg and move your opposite hand to grip their same side collar (your arms will cross).  Now pull yourself forward placing your head on the same side your hand is, creating an intense pressure from the tripod position
The lasso guard is set-up like a spider guard, but you control one sleeve and have their arm wrapping your shin.
  • Lasso guard to oma plata:  If you chose to dive or if your opponent attempts to pass your leg, spin underneath, clear their leg and obtain the oma plata.
  • Lasso guard to sweep: Rather than going all the way to the oma plata, keep your shin against their cubital fossa.  Either push on your ankle with your free foot or triangle your leg to sweep your opponent by their arm.

11.09.2013

Tiago Alves Seminar: They can beat you. They can cut you. They can hurt you. They can never take your knowledge.

Today I went to a seminar by Tiago Alves hosted by Max Burt of Muncie Brazilian Jiu-Jitsu.  We started with a timed jog around the abundant mat space of the gym.  Then we did mat lengths of:
  • Shrimping: Use your foot and the ipsilateral shoulder to elevate the ipsilateral hip, moving it laterally and superiorly, nearly turning over.  Use the walk between the hips and the foot/shoulder to move down the mat by alternating sides.
  • Forward Shrimping: Using only one foot and the ipsilateral shoulder, lift the hip on this side and move it toward the foot by bending your knee and activating the leg muscles.  Move down the floor by switching sides, again walking by using foot/shoulder and the hip.
  • Shoulder Roll:  Sitting on the mat with your legs extended in front of you, roll to your shoulder by tucking your hand underneath the space between the floor and your legs made by bending your knee.  Roll shoulder to shoulder, not over your back, your feet can touch the mat if you're flexible enough.  Position yourself at a 45° degree angle to the wall so that you can roll one way then pivot 90° to roll the other.  In this fashion you can work your way down the mat.
Next we moved to partner drilling from the four points position.  The hips and upper thighs are the contact and control surfaces for you as the top player.  When the bottom partner moves you can either switch hips or you can walk.  The entire time work on dropping the hips while you move, not raising them (which at first glance seems to be needed to move), simultaneously keep the legs wide.  There is no need to "run" around your partner, simply alter the direction but not the magnitude of your pressure.  We  drilled 60 second intervals where the four points partner moves but does not try to escape while the top partner cannot grab, isolating hip and leg movement.  Then we added grips and drilled it again.  Next we covered the cases where the four points partner attempts to pull guard or to roll:

  • Pulling guard: As the top player, you feel their body shift, keep your legs wide and drop your hips into your partner.  It is possible to move laterally to clear the legs, but you can end up sprawled on your partner's legs if necessary.
  • Rolling: If the bottom player tries to roll, make sure that one of your hips is placed on their sacrum and use the ipsilateral arm to hook your elbow anteriorly to their hip.  Then turn this corner, allowing the bottom player to land supine, while the top player secures side mount.

We drilled this in 30 second sets either "slow" or "fast".

After getting the movement of the four points position we moved onto technique for offense from the top:
  • Defend the roll, one hand lapel choke from the back: From the four points position, you as the top player secures your partner's contralateral lapel while placing your palm on the proximal part of your partner's near triceps (don't grab).  The bottom partner wraps the arm gripping their lapel and attempts to roll laterally.  Move with the roll, sprawling on your partners legs, then clearing them by moving further in the same direction. Your knee should end up in their popliteal fossa.  Use the free hand to grab the contralateral collar, across your opponent's anterior neck.  Move the contralateral knee (the one on the "rolled" side) superiorly up near your opponents shoulder, placing it on the mat.    Now roll to the mat on this side, pulling with the hand across their neck.  You will end up on your back, re-grab their forearm with your "trapped" arm, use the leg ipsilateral to your choking hand to overhook their shoulder and proximal arm to finish the choke.
  • Defend the roll, 180° roll to the one hand lapel choke from the back: From the four points, in the top position you again have secured the contralateral lapel and your partner on the bottom again attempts to roll.  However they feel your weight shift and recover, this recovery should relatively open the neck.  Secure a cross lapel grip with your free hand, anterior to their neck.  Release the original grip you hand and clasp their forearm on this side.  Now roll sideways, placing your shoulder over their posterior neck and pull them with you, somersaulting them .  You pull with the arm controlled side to allow their ipsilateral hip to cover your ankle, while your other leg overbooks the shoulder and proximal arm.  Use this to finish your choke.
Then from the bottom of the four points position we built and chained the following together:
  • Sit reversal:  From the four points position you circle towards your partner as if to grab their far leg.  Simultaneously kick the leg adjacent to them ceiling ward (you may have to kick more than once).  The kick rotates and moves your body so that the top players ends up sliding from your hip to the middle of your torso.  Remain propped on the elbow furthest from your partner and sit your far knee and shin next to your partner, the other extends across the mat.  Using a rear elbow motion to to pull them laterally over your proximal legs and hips.
  • Taking the back:  If your partner defends your reversal by stopping their momentum with their lapel gripping hand by switching it to the mat. Simply use your top leg to overhook their near calf,  remain propped on your elbow and pull your other arm tight to your body in the space between you and your partner. Grab their far hip at the belt line
  • Reversal from the whizzer: Your opponent whizzers the arm your freed and placed across your opponent's belt line.  Take your far leg and place the proximal part of the foot, into their popliteal fossa.  Now roll laterally and extend your hook reversing them to their back.  Now if they turn over to four points you can start from the beginning.
After the work from the four points we turned to the guard
  • Pump handle single leg with pass to kimura:  Your partner is posted with one knee up, you have control of both sleeves with your foot in the the hip opposite from the one posted up.  Your free leg acts as pendulum to get you sitting up and moving your base laterally in the direction of and around the posted leg.  Now feed the arm from the unposted side under the posted leg and grab the sleeve with the contralateral arm.  Remove the foot from their hip and hook their leg.  Now put your head just medial to their shoulder and sit up,  you can cup their posterior knee with your free hand, in order to do a single to double leg from the ground.  Now pin their bottom leg with the hand holding the passed arm.  Start circling toward their open side, following the "pump handle" arm to its origin.  Their free leg can stay betwixt your legs until it gets to be hip height.  Now slide over it, placing your inferior knee to their hip.  Now transition further, circling their head.  Use your free hand to undertook their arm posteriorly, release your sleeve control hand to secure kimura.
  • Koala guard to 50-50 60-40 guard:  You have the same set-up as above but after you have secured the grip on the passed arm, your partner stands.  Use your free hand to grab the skirt near the butt. Put the foot posterior to them at the anterior side of their hip.  Use this foot and the skirt grip to rotate your head to be lateral to their far leg.  Pike up and secure a triangle over this leg and the arm, with medial leg (the one placed in their hip) passing anteriorly to their arm and this foot extended laterally from their body and posteriorly to your other leg (i.e. medial leg forms two parts of the triangle).  Sweep them backward by flexing your leg and extending your hips.  You are now in 50-50 guard but in reality its more like 60-40 since you have them more controlled than they do you.
  • 50-50 guard pass to ezekiel choke and arm bar: From the 50-50 guard lay supine, clear their triangled leg by passing the hand lateral to them posterior to their heel, cupping it and moving it laterally.  Place the lateral leg knee in their popliteal fossa and then bring your other (medial leg) shin behind their thigh by pulling your knee to your chest.  Now clear their leg in the opposite direction as you come to your knees, pushing them onto their side facing away from you.  Bring your inferior arm medial to their upper arm and to their contralateral neck, place the shin of your inferior leg into their back.  Ezekiel choke by using this hand to grab the sleeve of your opposite arm.  If they have strong neck, keep your inferior arm wrapping their neck and use the other hand to scoop up their arm nearest the mat.  Move your superior leg over their head and sit for back for arm bar.
  • Koala guard to taking the back:  Should they free their gripped sleeve while going for your 50-50 set-up, simply place both of your shins into their popliteal fossa, pull on the skirt to gain access more gi and belt.  Now make them squat as your kick both shins forward to obtain rear mount.  Seat belt grip to control while getting hooks.  Tiago grabs his fingers and places his seatbelt higher and nearer the neck than I am do, so I will try this as well.
Front Row: Your humble blogger, Tiago Alves, and newly promoted faixa preta Max Burt

11.06.2013

Balance thyself, unbalance thy opponent

Another day of upgrading my striking software.  I know I need to relax, my body just hasn't agreed yet.  I am cognizant of my new first commandment: "Balance thyself, unbalance thy opponent."  I'm just not sure I can apply it.  Again when side stepping, the head moves over the moving leg, like a normal step, just laterally and rotating.

We reviewed the walking knees.  With a lead leg half-step, land on the ball of the foot, the rear knee goes straight forward as you extend your base leg and open the chest.  The knee drives forward, made sharp by the flexion of trying to get your calf to your thigh, the foot angles laterally to drive the knee midline.  A fluid, seamless, hip thrust finishes the knee.  In order to maximize precision, the hands simultaneously turn an invisible steering wheel toward the thrown knee side.

Ian then showed some clinch knee technique.  From a wrestling tie up, throw three curve knees, then pummel inside to plum.  Drop step backward, and simultaneous snap the head.  Throw a straight knee.  If they are strong, i.e. you are unable to pull toward you, push the side of the head, perpendicular to your original pull, re-establish plum and drop step pulling them in the same direction.

Plum defense, reach one hand lateral to their clinch and grab the neck, pull the this arm as you twist this shoulder toward your opponent.  Now, trip them over your leg on this same side.  This can be drilled in knee sparring, with one opponent simply using the shoulder twist to defend and counter, keeping their hands behind their back.  You can use the fist to hold by placing the glove knuckle behind the head on the opposite side.

10.24.2013

Back'n Wrap

I was playing with wrapping the kimono around my opponent's arm the other day and two possibilities appeared.  Now they need some refinement but here's what I've got for now:

  • From the guard, after wrapping the arm and attempting to pull it across for the armbar your opponent resists by pulling their arm back toward their body.  Adjust your wrap to further encircle the arm, then assist their motion and push their arm to the body, then set-up the triangle over the manipulated arm and switch to the opposite triangle.
  • Again from the guard, wrap their arm, and pull for the cross arm lock.  If they defend, pass the gripped part of their kimono to your other hand, which has either gone behind their head or (if you have excessively long arms like me) their back via their opposite axilla.  Now post with your free hand and look for rear mount as you rotate them by pulling on their kimono.  If you have passed the kimono to the arm encircling your head you can choke them with their kimono by sliding your newly freed hand down your forearm on the side most proximal to your opponent.

10.21.2013

Unathleticism

Your martial art, technique, and style should work for everyone regardless of strength, speed, stamina, size, or any other attribute. Intensive study of your martial art should refine technique, increasing your ability to defeat people of superior attributes.  Better attributes, i.e. better athletes, will obviously have better success, so the development of attributes is important but does not exclude improving technically.  The exclusion of skill for strength is as futile as thinking strength is not part of skill.

Today I worked on relaxing.  Which I think I do, but apparently I don't.  Ian and I worked on throwing the jab, without cocking but allowing the lead foot and hand to simultaneously land.  It is important to step without trying to jump off the rear foot.  And don't push, don't try to hit hard, just flick the hand out there as fast as it can, without trying to move it fast.

We worked two combination set-ups:
  1. Jab-rear body kick/Jab-fake rear kick-lead kick: Short step "range finding" jab, then step laterally to throw the rear body kick.  Your partner catches and leg covers.  After this set-up, repeat the jab, then roll the rear knee medially, "showing the rear hip" to fake the kick.  Step the rear leg laterally to throw the lead kick to the body.
  2. Jab-rear body kick/Jab-fake rear kick-cross-rear kick: Same set-up as above, but this time on the rear kick fake lift the knee, rotate the knee medially and rotate the rear shoulder through to throw the cross.  Then put the foot down to throw the rear kick.
This is the "Superman punch" but without leaping forward.  The advantage is that it is still a fake, but doesn't make you overcommit or get off balance.

We also worked some kicks, particularly obtaining height without sacrificing balance or speed.  A small lateral step is needed to permit hip rotation.  The knee rises to point at the target you wish to hit.  Rise up on the balls of the feet as the hips turn over, whipping the leg into the target.  Then recover rolling the base leg foot back to the mat and landing with the ball of the foot of the kicking leg in the rear position.

10.09.2013

I throw elbows until the skin comes off

Some late notes on elbows.  I had my muay thai private earlier this week but one has to do the things that pay the bills before doing the things we do for thrills.  Not that writing notes is thrilling but it certainly helps me remember.

We used a short stepping jab followed by a longer stepping rear elbow.  So the first step is short just to get us to range, while the follow-up elbow is based on the feel of the opponent.  The second step, should bring your lead foot parallel with your opponent's lead foot.  Simultaneously the shoulders and hips rotate to deliver the horizontal elbow.  It should turn over, whipping the bony tip of the elbow into the bag, your fist ending up next to your chin on the opposite side, as if you had a sudden itch on your shoulder.  Your opposite arm covers your head.  Recover rapidly to your original stance.

The jab same side horizontal elbow uses the same short stepping jab, but this time partially retract the jab hand, and step your lead foot parallel to your opponent's lead, but midline.  You are essentially lengthening and narrowing your stance.  Simultaneously rotate your shoulders whipping the tip of the elbow into the bag and recover.

The stepping is important to deliver the short range of the elbow to the target.  It is key that the elbow rotate into the bag, avoid forearm smashing instead deliver a maximal amount of force to a minimal amount of surface area.

Next, in a display of saintly trust, Ian let me throw elbows at him.  We worked two scenarios, off the soft and hard cover off the jab.  If your opponent is relaxed you will punch into a pillow, after the next jab, roll your lead hand around his wrist and pull, ripping his structure from his head, and throw the same elbow.  If he is resistant and bounces off your jab, then throw another jab, roll around his wrist and pull him to your centerline as you half twist to drive in the elbow.

Last we tied up, wrestler style.  Use a small drop step and a sudden jerk of your nearest/rear hand to pull him sideways, then rapidly deliver the rear horizontal elbow to the temple with a counter twist.

9.29.2013

The Shower Technique: Biomechanical Concepts of Protection Against the Guard

Introduction
Today I went to a seminar by Brazilian Jiu-Jitsu faixa preta (black belt) Octavio Couto focusing primarily on the biomechanics of defending protecting yourself inside the guard.

Palm-Up Concept
The core biomechnical concept was using the forearms in the palm-up rather than the palm-down position, to allow more activation of the back, e.g. the position you are in when doing pull-ups, deadlifts, or lifting a box.  The angle of flexion of the elbow should be approximately 90°, increased flexion (more acute angle) will collapse, increased extension (more obtuse angle) exposes you to submission (see below).  This is a stronger biomechanical framework than palm down, i.e. "grabbing the pajamas" (kimono), which makes it a structure for obtaining posture, negating offense, and creating space.  That does not excluding grabbing the kimono, i.e. pronating the hand once more, once you have optimized your posture or position, but the supinated position allows you to apply greater strength with less effort.  In general, avoid grabbing/pronating unless your grip is below the belt.  The palm-up concept can have the arms in any position, i.e. they can be parallel, triangular, square, or opposite.  A similar concept is used in Filipino martial arts in knife and stick passing drills.

Horizontal Visual Plane Concept
The secondary biomechanic was head position's influence on posture, by keeping the eyes on a horizontal plane while still being aware of your opponent, you establish a straight spine.  A straight spine has been demonstrated to be stronger, it's the position we (should) use to do any Olympic lift.

Drills
  1. "Obtaining closed guard versus the palm-up biomechanic": Allow your partner to obtain grips in the open guard, using the above two concepts keep them from obtaining closed guard.
  2. "Protecting from guard attack using the the palm-up biomechanic": In this drill your opponent has you in the closed guard and attempts to attack, e.g. arm bar, choke, sweep.  Use hip movement and the above biomechanics to shut down your opponent's offense and enlarge the space they have already created when attempting offense.
  3. Combine #1 and #2 above
Straight Arm Bait, Palm Up Defense
Once you have obtained an erect posture, inside their closed guard, supinate and grab the gi collar at the level of the shoulders.  Lock the arm, this allows you to not only hold your partner to the mat efficiently but also baits the arm bar.  The other arm is kept back, shielding that side, palm towards you, elbow on their leg  If they open their guard, immediately release and supinate the hand, returning to the protective palm-up position  If they attempt to triangle, use the shield arm to guide their leg over your head, and presenting the pass.
While Octavio taught a guard pass to the white, yellow, and blue belts, we worked on this.  After having us train this he had the black belts teach small groups of students while he observed and provided feedback.  I've never had to teach at seminar before, but it was an effective way of learning.

Palm-Up Guard Pass
From the hooks inside guard with your partner set-up to sweep, take one hand and grip the opposite pant leg, palm toward you, elbow parallel to slightly away from you.  Your other arm is in the opposite direction, in the palm-up position.  Now follow the elbow pointing away from you to essentially walk around their hook.  Keep a low base, place the knee nearest the direction of the pass proximal to their body near the heel of their foot.

Conclusion
The palm-up position allowed Buchecha to take Rodolfo's back in with 2013 World Championships (see about 5 minutes in):
Octavio points out that Brazilian jiu-jitsu is about technique, strategy, and efficiency.  One cannot explode for 10 minutes straight, no caliber of athlete can.  However, Brazilian jiu-jitsu is also about taking risk, as demonstrated by Buchecha when despite being ahead on points risked being swept to take the back.  We can simply roll staying within our safety zone, but we cannot improve without taking risk.

As for the Shower Technique, the continual movement of your hands in the palm-up position, looks like someone lathering themselves up for a shower.


9.27.2013

Step Kick

Today's lesson was on the step kick.  Starting at jab range on the heavy bag, step laterally with the rear foot, circling the bag.  Your lead foot should step behind, becoming the rear foot.  Simultaneously a throw the kick with the (new) lead leg.  The idea is to move around your opponent, in an arc of 90° and at distance they cannot (easily) counter.

After throwing the kick, you can place the foot down in a new and opposite lead or retract the foot to your original lead.  Alternatively you can float the kicking foot laterally, toes pointed away from the target to throw a lead kick with the opposite leg.  Drive the knee high, then turn it over to throw the kick as your upper body rotates to throw the kick.  If you want to close for the elbow, drop the kicking foot close to the bag, in an extended stance.  Throw the rear elbow like a cross rotating your shoulder and elbow into the same line.

90 minutes of discovery on a kick that I've already "learned".  Obsession does not always equal madness.

9.17.2013

The Formula

I figured it out:

Speed(Relax, Posture, Footwork, Balance) ~ Power

Now I just have to solve it.

Shadowboxing: Don't jab then step, step then jab.  Transitions are from left lead to right lead stances, and I must be able to move anywhere and throw anything from each one.

Knee Laps: From the balls of the feet, take a half-step with the lead foot and rise off the ball of the foot to throw the knee.  The knee goes straight ahead, knee angled toward center (causing the foot to angle laterally), thrust the hips but keep the head over the base foot.  Arms turn like a steering wheel, the knee side forearm shielding the face.  Chest opens up (i.e. uncurl)

Tiip: Bring the rear foot to the lead foot. It should be flatfooted and the leg straight.  Bring the knee up, leg bent and as the leg extends thrust with the hip.  Keep chin tucked and the head remains over the base foot.  Recover forward one step with the same lead, or step back into the opposite lead.  If the bag is swing start the step at its apex away from me.  You can extend the arm on this side to push away an opponent after a missed tiip.

Tiip-Side Tiip: As above but recover to a straight legged nekoashi-dachi (cat stance) as the bag reaches its far apex, bring the knee high, and rotate on the base leg to throw the side tiip.  Arm extended on this side for defense.  You can train the speed of this technique by starting closer to the bag.

Tiip-Fake Tiip-Jab:  Throw the tiip.  Again at the far apex step rear foot to front and lift the front knee as if to kick, instead of extending, throw the jab-cross/cross hook.

Jab-Fake Jab-Tiip: Step and throw the jab.  Step back and again step forward faking the jab, now roll your weight onto your rear leg as it straightens.  Lift your lead knee, leg bent and thrust forward at the hips.  Recover backward or forward.

Tiip-Rear High Tiip:  Throw a tiip as above and recover to the step forward. Roll onto the lead leg, drive your rear knee high and thrust from the hips as the leg extends, open the chest.

9.10.2013

Whip it. Whip it good.

My warm-up was shadow boxing, for some reason my jab hand and foot are not synchronous.  I blame my absolute lack of rhythm.

We then reviewed the short and medium rear kick on the bag.  It is key to relax, to allow the best, relaxed technique to whip the leg to the bag and back.  Relaxation = speed = power.  I also need to shoot the jab straight out, twist it over, and then back to my head.  No pawing or rolling the hands.  The kicking side arm whips downward to create greater kick speed, like a runner, and then back up to protect the head.

Next Ian introduced short and medium range lead kick on the bag.  Short range is done with a cross hitting the bag, one needs to cross without over twisting.  Then the rear foot springs laterally with the toes perpendicular to their previous position, allowing the body to twist, rotating the hips to deliver the rear kick.  The medium range has a small step to deliver the cross to the air, followed by a 45° step and foot rotation to deliver the kick to the bag.  Recovery is to the opposite lead.

On both kicks I need to recover by rolling the base leg foot from ball to heel.

The next technique we covered was the defensive tiip: bring the base foot to your lead heel, drive your knee up to umbilicus height, while opening the chest (i.e. unrolling from the the based hunched posture), then jab with the foot by thrusting with the hips.  One can either place the lead leg in a new stance having advanced a step (if they were thrust backward) or step back, switching to the opposite lead.  It is important to remember to straighten/lock the base leg.

Side kick tiip, is a technique I've never seen before.  Thrown at a hip span further away, the kick starts like a regular tiip, with the knee rising straight in front, but rotate your hips sideways to throw the kick like a ball of the foot side kick toward the end.

I still don't relax.  I speculate that I'm either bracing in a vain attempt to stabilize and prevent injury or I like to posture like a silverback gorilla in heat.  I also pose despite ample evidence of my poor photogenicity. I stop like someone would want to take my picture, despite the fact that no photographer is present.

8.26.2013

Good coaching is about telling you what you need to hear, not what you want to believe

Despite attempting to divorce myself from ego and distance myself from pride, I've still got them.  My saving grace is that I have a greater desire for improvement and a central processing unit that contextualizes information well.  As I get instruction from Ian, I'm simultaneously mortified by how plainly obvious (after he explains or demonstrates) technique is and astounded that I wasn't doing the abundantly obvious already.  I can either blame lay off and injury for that, or just accept that this is the nature of improvement.

We started with shadowboxing, for reasons that elude me I'm still tense, I'm like water, unfortunately it's water at about -7°C.  We actually video recorded some of my workout (which will hit the internet sometime after my sex tape) and I do some sort of hand jive everytime I step.  It looks terrible, and if you time it right you can punch me in the face.  So that's out.  Next I still have difficulty fully extending my jab and having this occur simultaneously with my lead foot landing.  Another thing that I have trouble with is the posture, I actually have very good posture but for muay thai a more hunched posture with scaphoid abdomen is advocated, which allows more hip pivot.  Also I need to stay just barely on the balls of my feet, without rising on the rear foot as I come forward to throw a cross.

I worked on the perpendicular turns.  Again, one of the keys to this style of muay thai is that you are never, ever off-balance.  Each component is on balance, allowing a seamless flow from attack to defense.  When I step with the rear foot, it pivots inward, toes toward me, however I simultaneously shift my weight between my legs to begin the evasion and smoothly slide, rather than fall into the pivot.  A smaller step is fine, if I'm worried about misstepping.  It is important to use the hand on the side you are pivoting to as a guide/slap this helps your upper body turn allowing the former lead leg to flow into its new rear position.  The pivot foot rolls to the floor (a lá the stance switch in my first lesson).

There are two methods to generate power.  The "brute" method is simple and direct, apply more strength and weight to generate power.  The advantage is it has no learning curve and requires no technique.  The drawbacks are many fold: increased injury potential (for you), athleticism dependence, unsystematic and therefore unteachable, and sacrifices balance.  The "technical" method is still simple but more indirect, applying proper technique leads to efficiency, efficiency leads to speed, which translates into power based on dependence on velocity.  The advantages are that you can learn technique that is maximally safe for you and damaging to an opponent, it is systematic and while being an athlete helps it is not the limiting factor.

The "brute" method is exemplified by the haymaker, the bigger and stronger you are the harder you hit with it,  if it connects and you don't break your hand.  A "technical" method, i.e. a fast, straight, and accurate jab, can beat the haymaker, if you will, to the punch.  I like to brawl, I won't deny, but it has diminishing returns so I try to be more technical, only to cock punches and shift my weight into an unbalanced position.

The last drill we did was a jab-kick combo in the heavy bag,  The first version was step jab hitting the bag, then lateral stepping, toes pointed away from the bag while simultaneously throwing the kick.  Not so much a hop and kick as a slide and kick.  The shoulders turn through, making the leg whip the bag, and then pivot back using the step to offset yourself.  We did a second variation at greater range, where the step jab is away (not hitting the bag), then taking a 45° step to deliver the whip kick.

8.21.2013

Oppositional Defiance to Relaxation


Another session of muay thai today, starting with a shadowboxing review:
  • Relax
  • The shoulders roll forward, making the abdomen scaphoid.
  • Once again, the jab lands when the front foot lands.
  • The cross power is generated by the pivot of the rear leg on the balls of the feet, without leaning.
  • We worked on the leg cover which occurs by straightening the base leg and when the cover leg rises so that the knee sits just inside the elbow, toes pointed down (contrary to the style I have previously learned).  The straightening of the base leg is to shift the weight securely over this limb, to prevent being knocked over. 
  • When stepping off for the kick, the ball of the foot lands as the weight shifts toward this leg, this allows the transfer of weight without being off balance.  Rise up on the toes, extending the body when you kick.  If you need to check your balance, throw a half extended kick and hold.


We did a few focus mitt movement drills:
  • Step-Jab
  • Halfstep-step jab
  • Halfstep jab
  • Step jab, jab (do a "nonmoving step" to generate power of the second jab)
  • Step jab, jab-cross
  • Step jab, step jab-cross
  • Step jab, retreat jab-cross, left-1-2 90° turn


Lastly we did a movement drill, retreat to the ropes, do a rear foot perpendicular turn, roll through to your normal side and shuffle back to the center, now retreat in the opposite direction to the ropes, do a lead foot perpendicular turn, and shuffle back to the center.

I need not lunge, but I need to relax.

8.15.2013

Mastery of Inertia


I try to figure out concepts when I train, to give my brain a "big picture" of what I'm trying to accomplish.  Today's muay thai lesson was all about mastering inertia.  In all fighting if you have absolute control of your position and direction of movement you are probably going to win.  Ian is attempting to show me how each piece of movement, offense, defense, and footwork are discrete packets that are seamlessly woven together.  If this were calculus, movement is the derivate, the completed action the integral.  For them to be seamless, I must retain my posture and balance.  No chasing, no lunging, no moment where I can't change direction.  It makes perfect sense, but is difficult to implement.  Rather than committing to a combination, you perform the first packet of your offense or defense and then based on what happens the next.  Your plan is open concept, able to change with the conditions of the fight.

  • Relax
  • Keep fight posture, that is shoulder rounded, chin tucked, with a scaphoid abdomen, while punching.  This makes it easier to twist, i.e. throwing hooks, and allows for more hip thrust, as they travel from back to front, during knees and kicks.
  • Small steps, you can always take another step if you need to get closer.
  • The jab needs to extend fully and lands simultaneously with your lead foot.  You don't need to lunge with cross, if they are out of range after the jab, reconsider your action, i.e. kick.
  • And, oh yeah, relax
The absolute control of my inertia extends to kicking.  The kick is delivered like a whip, the knee pointed at the target before turning over, allowing the lower leg to strike with the knee flexed or extended depending on the range.  The base foot pivots on the ball of the foot, and as it rotates back rolls to the floor, like the stepping drill last week.  This allows the kicking foot to be placed, loaded for movement or striking, rather than falling to the floor.  Remember as you kick that your body elongates, your shoulders rotate in a plane parallel with the floor and your hips.

Lastly, I learned how to turn perpendicularly: Step the rear foot laterally and pointed medially, about a shoulder span, then pivot to the opposite lead.  Check your balance by your ability to strike, defend, and move.  Shuffle backwards and repeat on the opposite (new rear leg side), returning to the same facing and lead as you started.  Don't lean your head past your knee and keep your shoulders parallel with the floor.

We used this to work a drill on the heavy bag, the "Jab-1-2": Close distance-jab-(1) lead foot lateral step and slap-(2) pivot to the same lead, perpendicular to your original position, rear kick.  Open distance and close with the jab-(1) rear foot 90° lateral step and slap-(2) pivot to your opposite lead, rear kick.  It helps to say Jab-1-2. Really.


8.05.2013

Forget emptying my cup, I'm emptying the entire cooler

I've decided to be selfish.  With time limited by familial and professional pressures, I'm focusing on learning more and self-development (translation getting back into shape and salvaging what limited skills I have).  Today I did muay thai, for the first time in over a year, in a private lesson with Ian Ransburg at Top Level Gym.  Ian is a positive, patient coach with a critical eye and he pushed my brain much further than my sinews (which is another good thing since I'm sinewpenic).  During the hour long lesson never even got my gloves on.

On Movement

Ian had me shadowbox for a little bit, before stopping me and starting the lesson.  First, I need to relax and loosen up.  I need to keep my hips over my legs, taking small steps to get where I need to go, multiples if I have to, rather than over committing, just in case my sparring partners aren't as impressed by me as I think they ought to be.  In order to be able to adapt my attack, I need to be able to move, I cannot move if I am overextended, so small iterative corrections are the method to deal with that.  In essence, stop lunging.

Jab / Lead Hook

The long range guard starts with the lead hand 6-8" in front of the rear hand, shortening the distance and increasing the speed of the punches delivery.  My hands needs to be higher, I have the tall man's curse of keeping them lower than is advisable.  The lead hand can feint, turning into a jab, hook, grab, or slap at a moments notice.  The recommendation is to feint while moving, making opponents hesitate.  Power is through speed and the transmission of the energy developed from forward stepping.  I apparently cock my jab hand, giving a photographer or an opponent that long moment to get that beautiful shot of my face.  The jab loads the cross, I need to lessen my over rotation on the cross, keeping my spine erect.  The hook comes directly from the long range guard, delivered by rotation, keeping my head forward, an upward angle is acceptable for the body, while the horizontal fist for the head hook.  Keeping the feet within the same square lessens over rotation.

Lead Knee

When leg covering, the elbow slides lateral to the thigh.  For knees, we worked primarily the lead, using a short switch step so that I'm not stepping into the knee, leading to falling forward but rolling my hips over the through leg, from here rising to the ball of the foot, as the hips thrust through.  This will force the shoulders back rather than arching backward.  The knee is aimed medially, making the leg and foot go laterally.  The knee leg should be tucked tightly to the thigh, sharpening the wedge like shape.  The kneeing leg comes back placing you in the opposite stance, from which you can work, or you can resume your previous set-up.  The kneeing side arm guards the face, with the antecubital fossa in front of your jaw, avoid rotating the body to do this.

Rear Kick

Move into range then roll through the base leg 45° to create an angle.  The knee comes straight up, and is aimed at your target, then the leg turns over, like a bullwhip power is generated by speed.  If you miss, do not spin through, rather place your kicking foot on the far side, as if you switched directions.  Take a step forward and then pivot around your lead foot to return facing your opponent.  The body is erect, and your shoulders and knees should be in the same plane when landing the kick, the lead hand whips downward.  The knee comes straight back, your leg should be bent when it hits the floor.

"Horse Stance" Sweep

A trick for use against an opponent not squared with you, but has the same lead.  Throw your rear hand across their body as you step in behind them, almost in a "horse stance".  Sweep your arm backward to trip them over your leg.

Switch stance footwork

Essentially use the bounce to roll off the rear heel to switch stance going backward.  Conversely, going forward roll of the lead ball of the foot.  Switch the guard so that the lead hand and foot are unilateral.


6.18.2013

Open mouth, insert foot

I seek simple solutions.  The more complicated we make processes the more they tend to develop errors and essentially not work.  This aspiration to simplicity typically makes me favor high percentage technique, I like attacking and defending in ways that work most of the time, no matter who I'm working with or how fatigued I am.  It has to work despite me, not because of me.  This makes me disregard or shelve technique that for me, nobody would ever let me set-up as the easiest and simplest ways of avoiding, in my mind, exist.  It makes my approach, my game, old school basic.  The only way I'm making a highlight real is if they catch me, people have seen my arsenal ad nauseum.  But it works, its teachable to anybody, and it reduces the chances of self inflicted injury, all of which I think are positives.  However, life is about challenging perspective, if you're not asking questions about why you might be wrong, you're assuming you're right, and there is a famous saying about assumptions and rear ends.

So today the class was taught oma plata off the defense of the cross body straight arm bar.  From your guard you attack with the straight arm bar, if they defend you can use the arm closest to their legs to pass their arm bent and inferiorly to set-up the oma plata.  Makes sense, high yield, and a valuable addition to any guard player's game.

The next technique was taking the back from the oma plata.  Here, in order to defend the oma plata your partner straightens their arm, bring it straight across your pelvis.  Most likely you've lost the position and they are going to limp arm out of the position.  If your lucky you can do the mao de vaca (cow hoof submission) or even an arm bar.   Instead, we gripped their far lapel with our near hand pulling it into their axilla.  Now you tilt their far side toward you and as you do swing your near leg over their head and back while bringing your near foot in as a hook, in other words taking the back.

I admit I shelved this technique almost immediately as being low percentage, with my luck they would be out of the poor position before I could even find their lapel.  Then after class, lo and behold I was rolling, had set-up an oma plata when my partner's arm plopped, magically, suddenly, across my pelvis.  Without skipping much of a beat I grabbed his far lapel, rolled him over and took his back.

Any technique, when it works, is a 100%, even if the sample size is only one.  A low percentage technique is only that because the situation where it works all the time is rare, not because the maneuver is intrinsically "bad".  A high percentage technique applied at the wrong time never works, it is still not relegated to the realm of "bad" technique.  If our goal is to elevate our skill, to craft the best game for us, the techniques whether high or low yield, must be arrayed in our arsenal to be used when the situation, the time, and the opponent is optimal for the application not by preconceived notions of what will and will not work.  Perhaps I, in my experienced wisdom, I should not be so quick to judge.

5.11.2013

Scrotal Compression Pass

Say you have a flexible opponent who likes to bring the leg inside to stop the guard pass.  Push their leg cross body, anterior to the other leg.  Under hook the straight leg and overhook the crossed leg.  Apply pressure as you pass.

Megaton Dias Seminar: The Best Position is Efficiency

Wellington "Megaton" Dias, your humble blogger, Jack McVicker

Keeping it Old School: There are no new techniques, just different things that become popular and different people who market them better.  While it is fine to learn the berimbolo, 50/50, rubber guard, or whatever, do not do so at the expense of basics and solid positioning.

Situation: Jiu-jitsu is situational, everything works but only at the right time and position.  You can't do what you want, you can only want to do what they give you.

Efficiency: All the positions of jiujitsu should not be focused on as individual and absolute solutions but rather as more or less efficient ways to win the fight, based on the situation of the moment.  Guard is a dynamic change from one type of guard to another, depending on which has the best cost to benefit ratio given an opponent and action at the moment.

Intellect should trump emotions:  Fight with your brain, not your fears.  It is the sign of a great fighter not that they win easily, but that they win in the face of overwhelming adversity by cool and collected intellect.

Illegal Techniques: While rank novices should be discouraged from doing illegal techniques, everyone who is aware of safe training should avail themselves of all techniques, including foot locks and knee bars so that they become used to them before they become part of their legal competition arsenal.

Closed Guard Arm Drag Series
From the closed guard, free the control of the lapel using two-on-one sleeve control, and pull their arm cross body and into the axilla.  Grip the triceps area of the the gi (or cup the triceps if no-gi).

  • Straight Arm Bar: Pivot your body and bring the leg over the head for straight arm bar
  • Reverse Arm Bar: If they resist the above and attempt to smash, bench press your knees and bring the near arm wrist blade over their other arm, just proximal to the elbow.  Grab with your other hand and pull down, keeping an arch in your body and hence space between their elbow joint a you for the submission.  Your ear should go to your shoulder, trapping their wrist.
  • Oma Plata:  If they avoid the reverse arm bar, swim your near arm inside and wrap catching their arm beneath the axilla, note that this is the other arm from the one you originally trapped above.  Spin for the oma plata submission by pushing your far foot against the lateral portion of their neck.
  • Arm Triangle:  In this case use a two-on-one sleeve control free the grip and to pull the arm cross body but do not trap it in the axilla, instead release the opposite hand control and wrap your partners neck, locking this hand into the deep figure four on your other biceps.  I usually place this hand on my head for added pressure.
  • Side Ezekiel:  Similar to the previous, but this time the wrapping arm's (still the one that is opposite the grabbed arm) hand goes inside your opposite sleeve and the knife edge of your free hand slides down your arm against their neck for the choke.

Side Ezekiel, Mounted Variation: If you insert one hand for a cross collar choke your opponent may turn on their side to defend, in which case switch to the technical mount. Free your grip and wrap this arm around their neck gripping the inside of your opposite hands sleeve.  The free hand slides down your arm to their neck for the choke.

Pulling the Guard to De La Riva to Pump Handle Sweep: Control lapel and sleeve, sit and place your sleeve-contol side foot into their hip.  Drop this foot to their thigh and push them away, use the pendulum action of your other leg to place the De La Riva hook.  Pass the sleeve under their leg to your other hand, then reach up and grab same side lapel and pull down as you tilt them sideways.

Spider Guard Lateral Sweep:  Control the sleeve grip with the same side foot in the cubital fossa and the contralateral side with lapel control grip and the foot in the hip.  Switch the foot in the hip to a De La Riva hook and switch the grip to sleeve control.  Now elevate the cubital fossa as you pull down on the sleeve on the De La Riva side to sweep them sideways.

Spider Guard Tomoe Nage Sweep: Control the sleeve grip with the same side foot in the cubital fossa and the contralateral side with lapel control grip and the hook under their thigh.  Pull your partner forward, and as their weight shifts move your foot from under thigh hook to their same side hip and elevate.  You should sweep your partner over the shoulder opposite the thigh hook.

Reverse De La Riva to the Back: From De La Riva guard, obtain a cross collar thumb pointed inferiorly grip on the lapel opposite your hook.  Take your other hand and place it anterior to the contralateral ankle.  Now bring the extended leg in and replace the De La Riva hook from the medial side, the former De La Riva hook leg frees the hook extends to their hip.  Now pull the lapel and use your opposite hand and legs to spin you underneath and between their legs.  The hook leg should rotate around their leg to be in position for the rear mount hook and your other shin should be behind their same side knee.  Grab their belt and kick this leg forward to obtain rear mount.  If they flop forward, like a banana, climb to take their back.

Lasso Guard to Biceps Slicer: Set up a lasso guard with your shin in the cubital fossa in the ipsilateral, bring your other leg across their body so you end up perpendicular to your opponent, with their forearm trapped against your abdomen.  Now grip the trapped arm's triceps and pull as your knee flares laterally.

Two Ways to Pass the Z-Guard
One of your legs is trapped between your partner's legs, the inferior leg is beneath your shin and your knee is sandwiched between this leg and your superior leg.  Grapevine the trapped  side's arm behind the superior leg and in front the the inferior leg.
  1. Post on your free leg, turn perpendicular and baseball slide out your trapped leg.  Immediately switch your hips back toward your partner to obtain side control.
  2. Fall forward onto your free side and step the trapped leg back over to the negative side.  Then switch your hips back to regain side control.

Ridiculously Simple Foot Sweep: Control the kimono at the elbow and lapel, take a pivot step away from the lapel control, lift their elbow and pull down on the lapel, as you sweep in front of (lapel grip side) where they would step.

Ridiculously Difficult Foot Sweep: As above, take a pivot step away from the lapel control, pull their elbow down and lapel up as you sweep in the direction of your step (elbow grip side), attempting to bring their near foot to their far foot.

5.09.2013

No joke chokes: One handed rear mounted choke

I have been working on taking the back, mostly because it is a lot easier to fight someone when you're behind them.  One of my problems is that getting the choke is difficult because my opponent attempts to control one of my arms, allowing the other to control the lapel.  My opponent knows that there is no way I can choke them if I only have one lapel control.
Solutions to this have been proposed: One option is the chicken wing choke but I find that getting the deep underhook from behind is very difficult when they aggressively tuck their arm down.  Another option is the wrestling version of the rear naked, but this means getting your arm all the way across their neck, which typically means they start defending that arm.
When I take the back if I plan ahead I can often obtain one lapel.  It is the other hand that gets stopped.  So I needed a solution:

  1. Rear ezekiel: From the rear mount obtain cross collar lapel control, with your other hand reach across and obtain a grip inside your sleeve on the opposite side of their neck from your lapel control.  Now cinch the choke by pulling on the collar while bring your forearm across the back of their neck.
  2. Rear sleeveless ezekiel: If your sleeve is unattainable instead grab the forearm with your opposite hand, palm facing you, blocking the posterior portion of the lateral side of the neck on this side.  Place your head next to their head on the opposite side as you pull on the collar and curl your forearm toward you.
  3. Rear lapeless ezekiel:  Again from the rear mount, free and then pass your kimono down the "negative airspace" across their neck to your opposite hand.  Slip your newly freed hand inside the opposite sleeve and drop your forearm across the back of their neck.  Drop your head next to theirs opposite to your sleeve grip.

3.02.2013

Andre Galvao Seminar "The guard is grip"

Tim Sledd, Andre Galvao, and your humble blogger
Today I attended the Andre Galvao seminar hosted by Tim Sledd and Small Axe Jiu-Jitsu.  I freely admit my fondness for basic jiu-jitsu, probably because I have faith that I can do simple and screw-up complex.  So when I heard lasso guard and inverted lasso guard I prepared for the probable demise and/or permanent maiming of my training partner.  But a price must be paid for education.
Galvao stated that getting and retaining a grip was crucial for successful guard attacks.  Losing the grip typically means getting passed.  It is critical to remember that the grip will lead to a high percentage guard game.  To strengthen the grip it is recommended that athletes do pull-ups with a gi thrown over the bar.
To do the lasso spider guard correctly, Galvao recommends bending the knees, keeping the thighs close to the body.  He argues that this gives the best structure for playing from this position.

Warm-up

We warmed up by doing lasso guard repetitions.  Thus using the technique we were going to train to get the core temperature up and the joints limber.  The lasso is obtained by gripping the sleeve on the outside and wrapping it with the fingers.  Now bring your shin inside their cubital fossa (elbow pit), bring the knee to you and then laterally, pulling with the  grip hand and applying pressure with the shin.  For this drill your opposite foot is in a spider guard position in the other cubital fossa.  We will now switch lasso to lasso from side to side.  Bring your knee proximally, toward you, clearing their arm, now bring it laterally moving your knee to the outside and then inferiorly to their arm.  Pull your knee medially and toward you, placing your foot in the cubital fossa, i.e. spider guard position.  On the opposite, do the reverse: bring your leg medial to their arm, and then move your knee inferiorly and laterally to their arm.  Bring your shin superiorly and medially to their forearm, placing the shin in their elbow fossa.  Use your spider guard foot to help switch your body angle and make it easier to set the lasso.
You will use the lasso to lasso switch, but now throwing a triangle into the mix.  Start with the lasso guard on one side, and switch to the other as above.  From this lasso, slide the lasso foot to their hip.  Now shoot the calf from the spider guard side across the back of your partner's neck and cinch the triangle.

Inverted Lasso Guard Sweep

Obtain a lasso on one side, hook your other foot on the distal, anterior side of their shin on this side (i.e. cross body).  Now dive underneath by reaching your free hand to the opposite ankle, displacing the hook you placed before.  You should now be parallel, but facing the opposite direction.  Now rock forward, using your shin which is wrapped by their arm to pull them forward over your legs.  You can triangle your leg to help you rock them forward.  If your partner stalls out and drops their weight, go perpendicular and roll them sideways, over your "free" side.  Do this by breaking down their knee with the hand you grabbed their ankle with earlier.  Now switch to oma plata, but pull them medially and kick your free leg through.  They will roll across your body.
In both cases they should land supine, with you seated next to them and their arm in your popliteal fossa (knee pit).  Pull it up so that your calf is under their triceps.  Grab your shin with your opposite hand to keep their arm trapped, now spin backwards turning their body over and setting you up for a tight oma plata.  Galvao noted that this series of sweeping and oma plata was an advantageous sequence for scoring points without ever having to pull guard if they managed to roll out of the oma plata position without submitting.
It should be noted that if your partner steps to far forward to defend the sweep, you can simply wiggle through their legs and "go out the back door" to subsequently take their back.  Watch that you don't leave any of your lower extremities in a position to be submitted.

Standing 50/50 Guard

If you try the inverted lasso guard sweep and your partner stands to defend, they will step back with their free leg.  This allows you to bring your free leg (the one not lassoing their arm) cross body,  laterally and posteriorly to the leg you hooked with your arm and then bring your foot anteriorly between their legs to end up in the inguinal area opposite the leg you are wrapping.  You may have to free your arm from its hooked position and grab their opposite ankle.  Now bring your opponent laterally by moving your shin against their arm and lifting with your wrapping leg.    When they land, free your the wrapping leg and place it on the mat.  Grab their collar and pull them to you and transition to the side mount position.
If you can't sweep them from here consider unbalancing them and go back to the inverted lasso guard sweep.
If they step too far back and are more perpendicular to you, bring the foot through to the side of the body closest to you.  Push them so that they turn away from you, release the lasso and place this shin in the back of their same side popliteal fossa.  Now you can take the back, or if appropriate rank look for calf slicer or ankle lock.  Beware that they can do a knee bar or ankle lock to you if you don't watch your lower extremities.

Obvious Submissions

Two "obvious" submissions were noted.  If you go inverted on the lasso guard, you can sit laterally to go for oma plata or spin all the way through and attack with the triangle.

Cabana Triangle

From the lasso spider guard, tilt on the hip opposite the lasso to straighten your leg and "hook" the small of their back.  Tilt back to square up with them again.  Now grab the same side collar on the spider guard side and grab their triceps on the lasso/small back hook.  Pull their triceps forward as you kick past their ear with your spider guard foot.  Cross your ankles behind their back.  Now cinch the triangle position by bringing the calf down over their neck and tucking it in the popliteal fossa of the opposite leg.  You can triangle them by pulling their head down or by doing the cabana.  The cabana is done by pulling your partner to you and hugging them with your arms inferior to your legs.  Now pull in with your arms and push away with your legs.

Perpendicular Oma Plata

Obtain the small of the back hook again but this time cross collar grip.  Again pull the triceps on the lasso/small back hook.  Your foot should post on their hip and your knee should drop to their shoulder. Your opposite foot stays in their cubital fossa but your knee goes medially and distal to you, resting on their opposite shoulder (the same shoulder your other knee is applying pressure to.  Now push their hand "into your pocket" with your near hand and transition perpendicularly as you triangle their arm by bring the foot from their hip over their shoulder.  Slip the free foot either under their far axilla (arm pit) or far popliteal fossa, if you can reach it.  Now place both hands on the floor ("wheelchair position") and walk away from your partner on your hands to apply pressure.

Drilling

Galvao stresses drilling and review.  After almost each sequence he would have us attempt the position with resistance and work from there.  As noted above our warm-up was lasso spider guard dexterity drills.  Later, he would have us start from the inverted lasso position and make use try to sweep with resistance of first one sort and then another.  He also outlined what he had covered and then let us work for 7-10 minutes on whatever material we felt most necessary for us to try again.  At the end of the seminar we did a "king of the hill" with 7-10 minute rounds of winner plays from the guard.  First round double sleeve control, second round lasso guard, and third round inverted lasso guard.

Conclusion

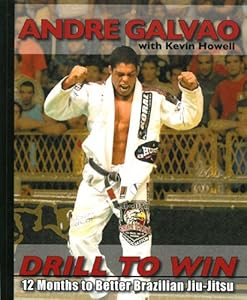
I would like to thank Andre Galvao for his time and teaching today.  I'm looking forward to adding the lasso guard to my game and am less afraid of inversion than before.  I'd also like to thank Tim Sledd for again organizing a great seminar.  This is no easy task and his guys may not know how lucky they are that their instructor routinely brings in high-level competitors who can also teach.  I'm also happy that in addition to learning and a photo opportunity, I got an autograph in my copy of:

2.25.2013

Machida's foot sweep

Is a thing of absolute beauty.


2.21.2013

The Amazing Spider-Man

The Spider-Man Drill should be familiar to all serious grapplers as an attribute and strengthening drill.  To recap take a position on all fours (without knees touching).  Your hands are roughly under your shoulders and your knees under your hips.  Imagine if you will your friendly neighborhood web-slinger clinging to a building but with less action-oriented posing:
To do the drill, lift one hand and replace it with the contralateral foot.  This should rotate your abdomen from facing the floor to facing the ceiling.  Each time you move you will switch the position of one hand with the contralateral foot or vice versa.  Your head should shift 90° in the hortizontal plane and your belly button should rotate 180° in the vertical with each limb switch.
I have recently begun to experiment with variations of the Spider-Man Drill to make it more challenging.  One simple principle is to use an odd number of switches in the same direction, e.g. 1, 3, or 5 clockwise or counter clockwise, and then adding exercises in between.  For example, walk (using all fours) from whatever position you end up in.  Or extend one leg inferiorly dropping first one hip to the floor and recovering, then the other.  Another drill that you can attempt is to add a series of exercises after each series of switches.  Today I placed my fitness ball to my right when I was in the downward Spider-Man as well as making sure that my Wavemaster Bag was in front of me.  Using a three Spider-Man switch I rotated through:
  1. Belly up, feet toward fitness ball: Dips with feet on fitness ball x10
  2. Belly down, feet toward Wavemaster: Feet elevated push-ups x10
  3. Belly up, head toward fitness ball: Place back on ball, alternating marching step x10 e/
  4. Belly down, feet away from Wavemaster: Hindu push-ups x10
You've just gone round the world with the Spider-Man drill.  Now let's do a more challenging variation.  Place a Bosu ball, sunny side down.  Again using a three Spider-Man switch and being careful to avoid the Bosu ball, I rotated through:
  1. Belly up: V-sits on inverted Bosu ball x10 (hint: slow and don't jerk)
  2. Belly down, feet toward Wavemaster: Placing myself in a push-up position with my hands on the Bosu and feet on the bag stand, try marching in place x10 e/
  3. Belly up: Place your hands on the Bosu ball and move your rear away from it so that you can perform dips x10
  4. Belly down, feet away from Wavemaster: Push-ups on the Bosu ball x10
I would like to explore the possibilities of using either ankle/wrist weights or dumbells to intensify the Spider-Man drill, but that will have to be another work-out.  I have held pad rounds while people did the Spider-Man drill as a conditioning exercise but also to expedite ground-n-pound striking, however my goal here was solo drilling, perhaps I can hit the bag...


1.18.2013

"A good plan violently executed right now is far better than a perfect plan executed next week." -- George S. Patton

Planning is simultaneously important and futile.  Important because it is critical that we examine what we intend to do and make the best prediction as to how we might accomplish it, but futile because no matter what we won't see all the variables and the other guy (the competition) has a bad habit of not following the plan rendering it less than completely successful.  Victories are won by planning more times than they are by improvisation, but adherence to a failed plan in absence of free thought has also led to far more losses than improvisation ever has.  Plans are like cookies, they should be made, must be made, but should be discarded if they get burned or go bad.
Looking back at my competitive career, I have been a far more careful planner when it came to striking (muay thai and mixed-martial arts) than jiu-jitsu.  Perhaps this is an artifact of competing in many more sport jiu-jitsu tournaments than muay thai or mixed-martial arts.  Things that feel more routine require less planning.  However, at the higher levels of competition, every competitive edge and especially planning becomes more important.
An important aspect of being "game" is willingness to enter the fray or the joy of locking horns.  Too often, and I see this in myself, planning is a list of reactions to what the other guy does.  To quote Marcelo Garcia, "Play your game, don't worry about what the other guy does."  If something doesn't work you have a back-up to that, but don't wait for your opponent to do something before you.  This isn't an conversation, it is not even an argument, you are giving a lecture and maybe you will grant your opponent a few questions at the end after your presentation is complete,
To that end I have designed a first draft of a Brazilian Jiu-Jitsu / Sport Jiu-Jitsu / Submission Wrestling Game Planning Worksheet.  It begins with a goal statement describing what tournament this is for.  It then has brief section on the stand-up phase and how you intend on getting the fight to the mats and where you would optimally like to be when that happens. You then describe how you would attack from your goal position followed by the position you think is the back-up or most likely position you would end up in when not in your best position.  Then you review what you would do if you screwed up, i.e. what happens if you make a mistake and end up in the position you hate most.  Here you describe how you would escape and get back to winning the fight.  Finally you should list two variants to attacks you described earlier in your plan as well as three things you need to improve on.

1.12.2013

Building a Simulation Drill

Technique does not make competitors, drilling does, but a place on the podium is earned by sparring in the gym.  Recently I discussed different drilling formats.  One type was the simulation drill, an interaction with your training partner suggested by what happens in non-training situation.  In sport jiu-jitsu it doesn't matter if you get on the podium by a single advantage or by submitting your opponent, different medals are not awarded for different types of wins, and first place is only earned if you don't lose.  Pressure in Brazilian jiu-jitsu wins fights.  Pressure is exerted by superior position, i.e. points, and pressure leads to submission.  You can be down on points and win by submitting your opponent, but if you're ahead (and you don't lose your head) in general you will have more opportunities to submit your opponent because you have superior position. Superior position has an associated point reward.  I think it is important to look for points and go after them, without losing sight of the submission or losing position for a submission attempt.
Example of sport jiu-jitsu openings and points awarded
From this schematic we can list the positions and point deficits that you could find yourself in, if your fight doesn't go your way.  These are listed below.

Guard / Half-Guard

  • Not down points
  • Down 2 points
  • Down 3 points
  • Down 4 points
  • Down 5 points
  • Down 6 points
  • Down 9 points

Side Control

  • Not down points
  • Down 2 points
  • Down 3 points
  • (Down 4 points*)
  • Down 5 points
  • (Down 6 points*)
  • (Down 9 points*)
*An opponent can transition from a mounted or rear mounted position to side control due to a scramble or feeling of greater control.  No points are awarded for either side in this case.

Mount / Rear Mount

  • Down 4 points
  • Down 6 points
  • Down 9 points
Based on this list we can design drilling scenarios.  For example, starting from the guard and being down two points with two minutes on the clock.  Thus the top player who is up two points might chose to stall, forcing the bottom player to look for a sweep and pass.  Or the top player may feel that a two point lead is to shallow, and strive to increase that margin.  Or either player might go for submission seeking to end the action.  Note that the behavior of either player should be affected by the position, point differential, and time remaining.  Being mounted and down six points should produce significantly different strategies than being no points down in the guard.
These simulation drills can be arranged a number of different ways.  Preselected time periods of 1 to 5 minutes could be used or they could be randomly selected by rolling a die.  Cards with position and point deficit so that these might be randomly selected can be found here.  Alternatively they could be prearranged, working on the guard for one training session and side mount another.  It should be noted that it is more likely that a narrow point differential exists with more time in the round remaining than a large point difference.  While I think it is important to drill pure escapes, there is a difference in strategy and energy usage when you simply escape versus having to escape and make up a point differential.
While we do not want to train our athletes to expect that they will be in a bad position, knowing how to deal with it if this should happen is important.  For me, I drilled from bad position was a way to work on conditioning and to work on my confidence.  If I knew I could deal with a mistake, I felt more confident taking even the small risks needed to attack an opponent.  Furthermore, this is a series of tutorials in the scoring system, how long it takes to score points, and strategies for scoring those points.

Unbeatable

I have been doing martial arts for a long time.  Through years of intensive study, I have found certain tricks...er...techniques to make you unbeatable.  Granted you sacrifice things like improving or winning but at least you can proudly state that you never lost

  1. Apply a sparring filter.  Whenever the opportunity to apply and test your skills presents itself, find an excuse not to wrestle, roll, spar, whatever with anyone who is bigger, younger, more athletic, or experienced.  Choose small, injured, white belts/novices for your partners, until they improve too much.  Be careful not to call attention to yourself by beating them so badly that they complain or get injured.
  2. When the pupil searches, the teacher will appear.  If your filter fails, fall back on this strategy: if they have more experience than you, just as you are about to eat a punch too much or get submitted call a pause to the action and seek their guidance.  Ask them what they did, ask them to demonstrate it, ask to try it yourself, i.e. anything to eat up the clock.  If you have more experience than them and they are suddenly doing a little too well, stop them and correct their form.  Explain what they were doing wouldn't work and had they done it another way they would have finished you for sure.  Eat up the clock if you can and be sure to reset in a neutral position.
  3. Knowing is half the battle. Prior to your round mention your age (older or younger), conditioning level, preexisting illness or injury to your opponent.  Do it firmly but softly.  If your partner has any human feeling they will lower their expectations and you can blitz them early to obtain an advantageous position.  If they manage to get ahead, cry out and blame the excuse from earlier, i.e. a lack of conditioning, a recent upper respiratory tract infection, or aggravation of a preexisting injury to stop early.
  4. Resting is training, too.  This works particularly well if there is an odd number of people training.  Be sure to vanish when ever drilling, rolling, or sparring is to start, this will allow you to skip the first round.  After this round has begun, position yourself strategically in the instructor's blind spot, you will be able to let your team mates tire themselves out.  When the coach finally spots you, you will have an advantage over everyone else.  Be sure to sit out as often as possible, or better yet, find a partner to alternate rounds with one guy who stays out every round.
  5. Psy-ops. These are advanced level techniques which take years to develop. They are not for use by the inexperienced:
  • Humor: If you are funny guy, crack a joke so hilarious that you partner loses it.  If you are not, start laughing hysterically at something somebody says, pausing the action.
  • Chemical warfare: Carefully prepare training gear by using it and never cleaning it, until it starts having a heady aroma of devastating body odor and cat urine.  If you are stinky, nobody wants to get close to you.  If they can't get close to you they can't win.
  • Be helpful: True story, one of my training partners actually told his opponent while they were grappling that it was against the rules to knee bar.  His opponent thanked him, let go of the knee bar, and subsequently lost the match on points.
  • Bathroom emergency: Without explanation make a sudden bee line for the bathroom.  Hide in the bathroom for several minutes and return with some toilet paper hanging out of your gear.   Attempt to restart with your partner, in a neutral position, of course.